Cotton Wool Sculpture Technique: A Step-by-Step Method
As a sculpture artist, I often work with lightweight materials that allow me to shape delicate forms without using heavy internal structures. One of the techniques I rely on most is my cotton wool sculpture technique, which allows me to create hollow figures with strength, softness, and control. In this article, I’ll walk you through my process step by step, exactly as I use it in my own work.
Preparing the Papier-Mâché Base
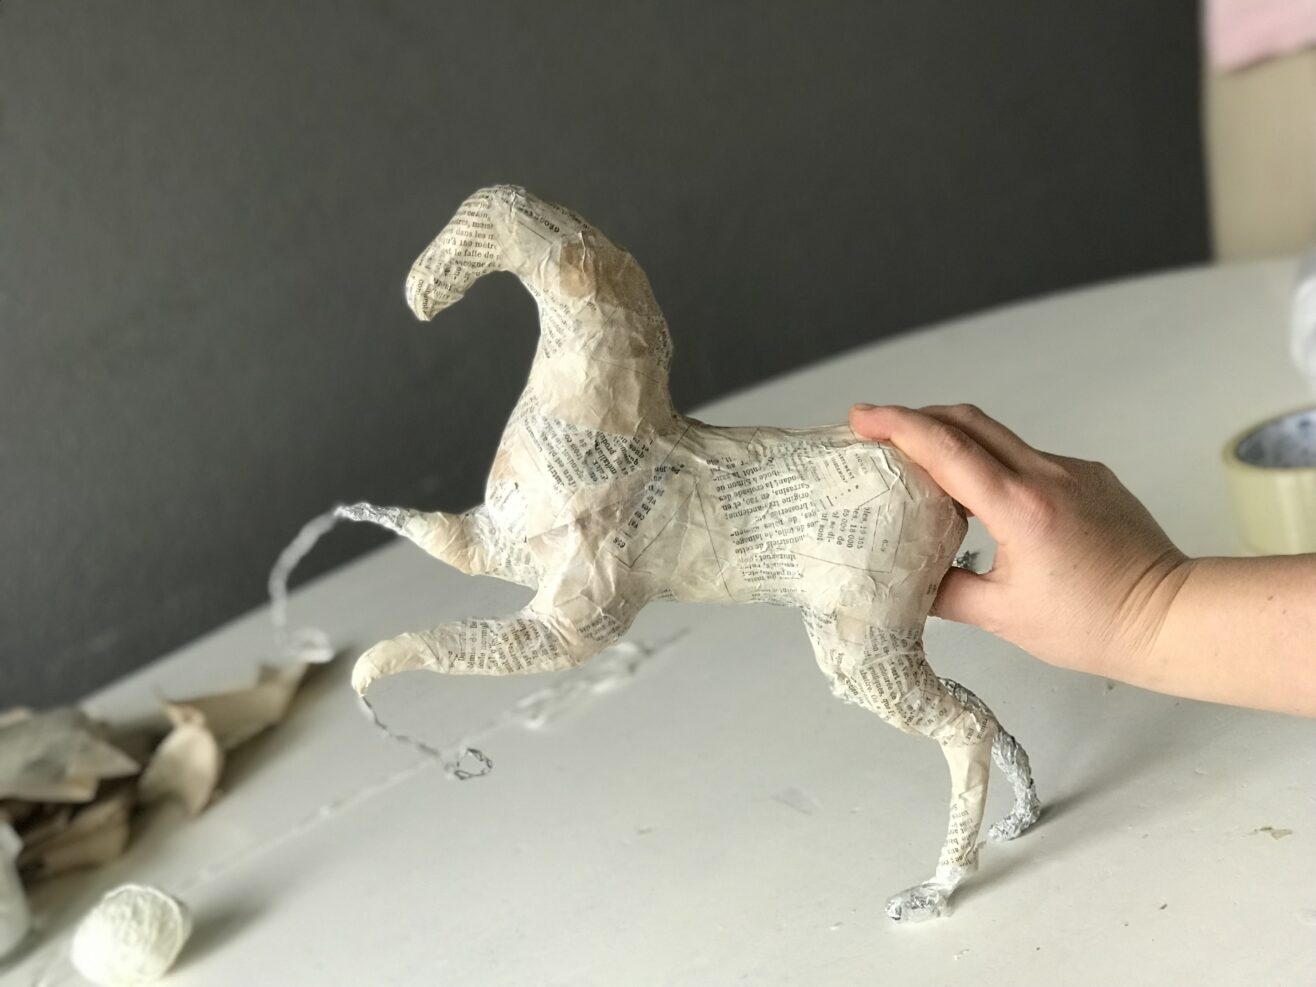
I always begin by creating a rigid papier-mâché base, which serves as a temporary mold. Once it is completely dry, I carefully sand all the parts. This step is very important because the cotton wool needs an even surface to create a smooth mold.
I also make sure that the papier-mâché base is slightly smaller than the final size I want. Cotton wool adds volume, so I always take this into account to prevent the finished figure from becoming larger than intended.
Before applying any cotton wool, I cover the entire base with a layer of wax. Varnish or transparent cling film can also be used. This layer allows the cotton wool mold to separate from the base later on, which is essential.
Applying the First Cotton Wool Layer
The first layer is the most critical part of my cotton wool sculpture technique. I always keep this layer very thin and rigid. For this reason, I use PVA glue or wood glue.
I never use starch glue for the first layer, because starch can deform the mold when it comes into contact with water. To keep the first layer strong and stable, I fully saturate it with a hard glue and allow it to dry completely before moving on.
Building the Cotton Wool Layers
Once the first layer is fully dry, I begin adding more layers of cotton wool. I usually apply three to four thin layers, never thick ones. I make sure to fully saturate each layer with glue. If I don’t properly soak the cotton wool, air becomes trapped during drying and creates an uneven or distorted surface.
After the first rigid layer, I can safely use starch glue for the next layers. Patience is key here — each layer needs time to dry properly before the next one is applied.
If I want to keep the sculpture hollow and avoid using an internal frame, I strengthen the structure during the penultimate layer. At this stage, I saturate the cotton wool with a construction primer or canvas primer. This gives the sculpture enough rigidity to hold its shape once the base is removed.
This step is especially useful when working on sculptures or figures that need to remain light but still durable.
Final Cotton Wool Layer
For the final layer, I return to the traditional technique using cotton wool and starch glue. This layer helps refine the surface and prepares the sculpture for finishing.
Again, I allow everything to dry thoroughly before moving on. Skipping drying time is one of the most common causes of problems later.
Removing the Mold from the Base
Removing the cotton wool mold from the papier-mâché base is the most difficult step in the entire process. I make sure that all layers are completely dry before attempting this.
Using a thin knife or blade, I carefully cut along the shape to separate the mold from the base. This requires patience and precision — forcing the mold can easily damage it.
Assembling and Finishing the Sculpture
After assembling the mold in two parts, I remove the entire base and glue the cotton wool hollows using a mixture of starch and wood glue. This thickens the starch base and prevents the figure from deforming. I then fill the hollow interior with cotton wool to maintain volume, and carefully dry the two-part mold.
The next stage is detailing the figure by adding volume in the correct areas to create muscle relief. For all detailing, I use thick starch glue, which provides rigidity to the shape. One drawback of this method is that the white cotton wool takes on a slightly creamy tone once dry.
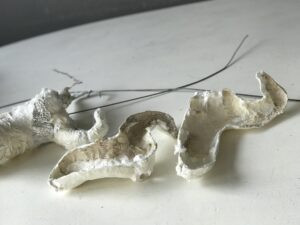 The figure highlights the sculpture body after cutting them into two parts. Finishing, Stabilizing, and Preparing for Painting
The final stage involves applying a clean finishing layer of cotton wool. The cotton wool pieces are prepared in advance, and the layer must be carefully balanced: not so thick that it becomes overly wet, yet not so thin that surface imperfections remain visible. This step is the most time-consuming part of the process.
Because the figure will later be detailed with color, it is essential to maintain the rigidity of the cotton wool and prevent paint from spreading along the fibers or leaving marks. To achieve this, I pre-coat the final layer with canvas filler mixed with wood glue, applying an even layer. I then add a layer of dry cotton wool, press it down, and smooth the entire surface. Using a clean brush dipped in starch, I fully saturate the cotton wool. Once dry, this preserves the cotton texture and prevents paint from bleeding across the surface during painting.
Due to the multiple stages involved, the process is lengthy. The cotton form becomes wet quickly and is difficult to handle, so I work section by section, allowing each layer to dry before continuing. It is especially important not to dry the figure at high temperatures, as this can cause the cotton wool to shrink.
Although the process may take several days, the result is a clean, smooth, and lightweight cotton figure that becomes highly refined after drying. |